


Commercial
Hikvision Access Control Case Study
Case Study
Site Brief
Imagine a four-level professional building with one public lobby entry, one rear staff entry, one basement pedestrian door, one secure comms or records room, and lift access that should not allow every user to reach every level after hours. The building also wants a tidy visitor workflow at the main entry and event logs that are easy to review later.
This is a strong fit for a controller-based Hikvision design because the project already goes beyond a single door. It needs user groups, schedules, stronger reporting, and a lift rule set that lives in the same overall system.
Suggested Hikvision Architecture
A good starting point is a main controller such as the Hikvision DS-K2704X mounted in a secure cabinet. That gives the project a controller backbone for the first group of doors.
If remote or additional doors need more structure, a module such as the DS-K2M002X can be used as part of the scalable architecture. On doors where the terminal sits on the insecure side, a secure relay such as the DS-K2M061 is worth considering so the lock-side wiring is better protected.
At the lobby entry, the building may want a combined visitor workflow rather than a reader-only experience. That is where a device such as the DS-K1T502DBWX becomes relevant, because it lets the buyer think about intercom and access control together instead of as separate silos.
For the lift layer, the DS-K2210 gives the project a clear way to extend permissions from the door to selected floors. That is what turns the design from door control into building-movement control.
Text Diagram: Multi-Door Hikvision Building Design
[Lobby entry reader / intercom]
               |
[Rear staff reader] -----------+
                               |
[Basement door reader] --------+--> [DS-K2704X controller]
                               |            |
[Comms room reader] -----------+            +--> [DS-K2M002X if more doors are added]
                                            |
                                            +--> [DS-K2M061 at insecure door positions]
                                            |
                                            +--> [Users / schedules / event logs]
                                            |
                                            +--> [DS-K2210 lift control]
                                                         |
                                                         v
                                                [Allowed floors only]
Smaller Hikvision Scenario: Medical Centre Front Entrance
Not every Hikvision access control job needs a full controller stack on day one. A very different but still practical scenario is the front entrance of a small medical centre, specialist clinic, or allied health practice where the team wants one combined device that can manage visitor communication and day-to-day staff entry.
That is where the DS-KV6124-WBE1 is worth recommending. It combines video intercom, keypad entry, card support, Bluetooth, app-based unlock, and dual lock control in one unit. For a medical-centre front door, that means staff can verify who is outside before release, while regular staff can still use a faster credential path when appropriate.
This kind of job sits between a plain standalone reader and a large controller deployment. The site still needs a thoughtful lock choice and a clear release workflow, but it may not need a heavy multi-door architecture yet. That is why the DS-KV6124-WBE1 is a strong fit for a front-of-house environment where intercom and access control are equally important.
Text Diagram: Hikvision Medical-Centre Front Entry
[Visitor / Patient] -----------------------------+
        |                                       |
        v                                       |
[DS-KV6124-WBE1 at front door]                  |
        |                                       |
        +--> [Video call / unlock request] --> [Reception / Staff]
        |
        +--> [Card / PIN / Bluetooth / app] -> [Authorised staff]
        |
        v
[Strike or maglock release]
        |
        v
[Medical-centre front door]
Implementation Steps
- Map every controlled opening and decide what lock hardware each one actually needs.
- Set the user groups and schedules before any reader is commissioned.
- Install the controller cabinet, power path, and supporting network cleanly.
- Connect the door hardware, exit devices, and sensors so each door behaves and reports properly.
- Add the lift controller if floor permissions are part of the project scope.
- Decide where intercom or visitor verification belongs in the entry workflow.
- Test granted, denied, after-hours, and alarm or outage scenarios before handover.
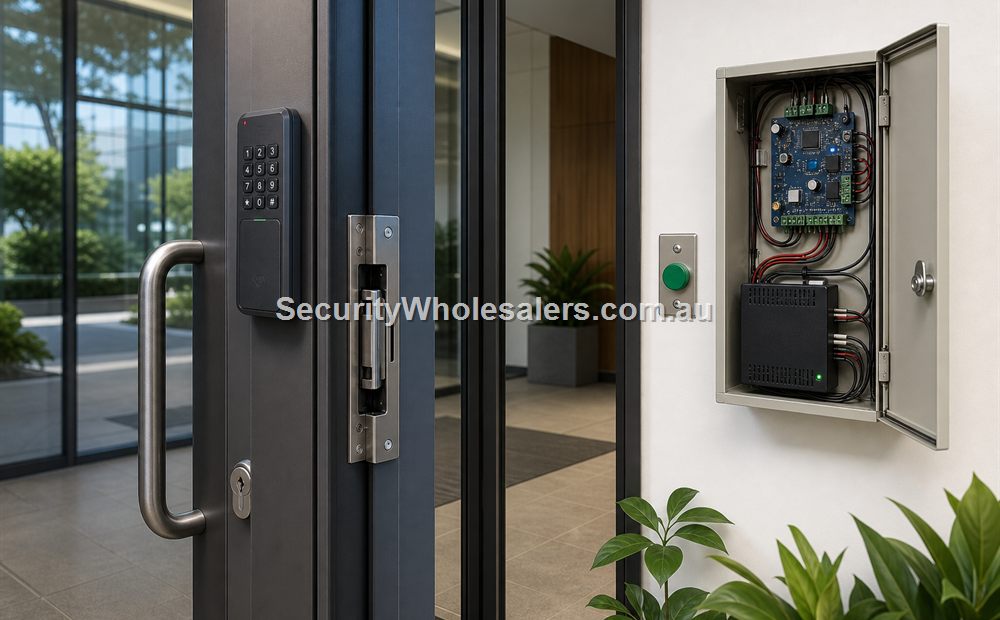
How the Hikvision Cabinet Should Be Built
In a real Hikvision deployment, the cabinet is where the install either becomes serviceable or becomes a long-term headache. The controller, backup power, network patch, relay interfaces, and labelled field cables should all be arranged so that each opening and subsystem can be understood quickly. The front lobby, rear staff entry, basement door, secure room, and lift interface should each be identifiable without anyone guessing which cable bundle belongs to which opening.
On doors where the reader sits on the insecure side, a secure-side module such as the DS-K2M061 can make the lock path much more defensible. That is particularly useful on public-facing or more sensitive doors where the client wants the exposed reader position kept separate from the actual release logic.
How the Hikvision Software Layer Would Normally Be Structured
In the larger building example, the software should be set up around named openings and real user groups rather than generic controller terms. That means doors such as Lobby Entry, Rear Staff Entry, Basement Pedestrian Door, Comms Room, and Lift Permissions should all be named clearly. User groups should then mirror the site: reception or front-office users, general staff, managers, cleaners, contractors, and any tenant or resident groups if the building is mixed-use.
That structure is what makes HikCentral useful. The client is not only buying hardware compatibility. They are buying the ability to answer operational questions later, such as whether a contractor still had access to the rear door, whether a cleaner attempted access outside schedule, or whether a credential was denied at the lift because the floor permission was never assigned.
What the Installer Should Prove at Handover
These case studies become genuinely useful when the final handover proves the workflow, not just the parts list. The installer should show the client that intercom-assisted front entry, reader-based staff access, secure-room restrictions, and lift permissions all behave as designed and all leave a readable event trail.
- Demonstrate a normal user entering the building and reaching only the floors they are meant to reach.
- Demonstrate a restricted user being denied at a secure room or denied at a floor they should not access.
- Review the event history live so the client can see the difference between granted, denied, and release events.
- Show how a lost credential is revoked across the whole Hikvision environment rather than one device at a time.
- Explain what remains operational under UPS or outage conditions and what depends on wider network or software availability.
Why This Architecture Works
The value of this design is not just the part numbers. It is the structure. The system knows which doors exist, which people belong to which groups, which floors they should reach, and what happened at each point in the workflow. That makes the site easier to administer and easier to grow.
It also gives the building a better upgrade path. If another door or another floor rule is added later, the project is already in the right kind of ecosystem. The buyer is not trapped in a one-door mindset that has to be replaced when the building gets more serious.
Why These Two Case Studies Matter Together
The bigger controller example shows what Hikvision looks like when the project is already multi-door and multi-level. The medical-centre example shows that Hikvision also has a strong middle path for sites that want combined intercom and access at the front door without immediately jumping to a full building-control architecture. That range flexibility is part of what makes Hikvision useful in access control buying conversations.
Case Study Takeaway
A good Hikvision access control deployment starts with the workflow. Sometimes that means a controller, secure modules, and lift control. Sometimes it means a combined intercom and access door station at the front entrance. The site decides the architecture, not the badge on the wall.
Relevant SecurityWholesalers Product Areas
- Hikvision Access Control - The main category for this ecosystem.
- DS-K2704X - Example main controller.
- DS-K2M002X - Example expansion module.
- DS-K2M061 - Example secure door module.
- DS-K2210 - Example lift controller.
- DS-K1T502DBWX - Example intercom and access crossover device.
- DS-KV6124-WBE1 - Example combined intercom and standalone access-control front-door device with Bluetooth and dual lock control.
Source References
Frequently Asked Questions
-
What does a practical Hikvision access control design usually start with?
It usually starts with the doors, the locking method, the user groups, and whether the site needs only doors or also lift permissions and visitor release workflows.
-
Why would a Hikvision project use both a main controller and door modules?
Because that architecture makes it easier to scale across multiple doors while keeping the system centrally managed and easier to expand later.
-
How does lift control fit into a Hikvision access control system?
A Hikvision lift controller can extend the user permissions beyond the entry door and determine which floors a credential holder can reach after entry.
-
Can intercom and access control be planned together in the same Hikvision design?
Yes. In many buildings the visitor call, the verification step, the door release, and the access event are easiest to manage when they are designed together.
-
Should this part of the site be marked on a plan before installation?
Usually yes. A marked-up plan helps confirm viewing direction, blind spots, mounting positions, and whether the chosen camera type still makes sense before hardware is finalised.
-
What matters more here: wide overview or clear identification detail?
That depends on the job of the camera. Some zones need a broad overview, while others need enough detail to identify a person, vehicle, or event clearly.
Extra buying notes for Hikvision Access Control Case Study
The Hikvision Access Control Case Study buying decision should be tested against normal use, after-hours use and failure conditions. If the quote cannot explain those three moments, it needs more design work before the customer commits. This is the kind of detail that helps a buyer compare quotes properly, because it turns the conversation from ?which model is cheapest?? into ?which design will still be useful after installation??
For Hikvision Access Control Case Study, the best final check is to ask what would make the system fail in practice. Common answers include poor cabling, weak power planning, missed user permissions, unclear response duties, too little storage, unsuitable mounting positions, or a handover that nobody can follow. A strong quote names those risks and deals with them before hardware is ordered.
For Hikvision Access Control Case Study, SecurityWholesalers should help buyers feel more confident, not more overwhelmed. The ideal outcome is a quote that is technically sound, easy to explain, and honest about where a simpler option is enough.