HiLook HA-KIT-IP2 IP Video Intercom Kit
$250.00$395.00
SAVE $145.00FREE DELIVERYWARRANTY GUARANTEED
✔ Dedicated 5★ Customer Care Team ✔ Fast & Responsive Tech Support
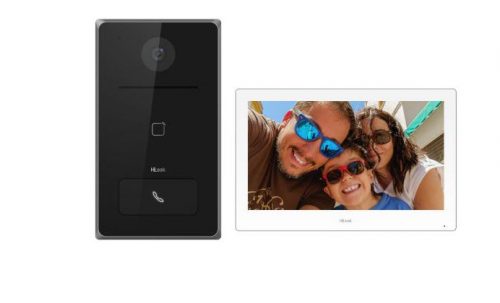
The HA-KIT-IP2 is an IP Video Intercom Kit from Hikvision’s HiLook range, designed for residential and commercial security applications. It includes one door station and one indoor station, providing a comprehensive intercom solution. Key features of the HA-KIT-IP2 include:
WIRING REQUIREMENTS;
> ethernet cable from Door Station to Poe Switch
> ethernet cable from the monitor to Poe Switch
> ethernet cable Poe Switch to the modem (if you wish to set up remote communication)
The HA-KIT-IP2 is a comprehensive IP Video Intercom Kit from Hikvision’s HiLook series, tailored for both residential and commercial security applications. This kit offers a seamless communication solution, combining advanced technology with user-friendly features to enhance property security.
Key Components:
Door Station: Serves as the external interface, allowing visitors to initiate calls to the indoor station.
Indoor Station: Acts as the internal interface, enabling residents or staff to communicate with visitors and control access.
Notable Features:
Mobile Control via Hik-Connect App: Users can remotely manage and monitor the intercom system through the Hik-Connect application, providing flexibility and convenience.
Single Call Button: The door station is equipped with one call button, simplifying the process for visitors to make calls.
Standard PoE Power Supply: The system utilizes Power over Ethernet (PoE), streamlining installation by transmitting both data and power through a single cable.
Additional Specifications:
Included Accessories: The kit comes with a rain cover and wall mount bracket for the door station, ensuring durability and ease of installation.
Power Adapter: An Australian standard power adapter is provided for the indoor station, ensuring compatibility and reliable power supply.
The HA-KIT-IP2 is designed to offer an efficient and user-friendly intercom experience, making it an ideal choice for enhancing the security of various properties.
Set up instructions:
The kit includes one door station and one indoor monitor, and it supports PoE, meaning power and data can run through the same network cable. The intended wiring is: door station to PoE switch, monitor to PoE switch, and PoE switch to modem/router if remote app access is required.
Step-by-step setup
1. Do a bench test first
Before mounting anything permanently, place the parts on a table and connect them first.
You will need:
HiLook door station
HiLook indoor monitor
PoE switch
Router/modem
2 or 3 Ethernet cables
Phone with Hik-Connect app, only if remote mobile access is required
2. Connect the cabling
Connect the system like this:
Door Station  →  PoE port on switch
Indoor Monitor → PoE port on switch
Router/Modem  → Uplink/LAN port on switch
The router connection is only required if the customer wants mobile app calling/remote access. For local monitor-to-door-station operation only, the door station and monitor can usually communicate through the PoE switch without internet, but app access will not work.
3. Power up the switch
Turn on the PoE switch.
Wait 2 to 3 minutes for the door station and monitor to boot.
The indoor monitor should power on. The door station should also power on through PoE.
4. Complete the indoor monitor startup wizard
On the indoor monitor:
Select Language.
Set the region/time zone.
Create an admin password.
Set the monitor as the main indoor station.
Set the room number as something simple, usually:
Room No: 1
Floor: 1
Building: 1
Use a password the customer will keep, because it may be needed later for the app, SADP, or changes.
5. Put both devices on the same network
The easiest method is DHCP.
On the indoor monitor, go to something like:
Settings → Network → Wired Network
Set it to DHCP / Auto Obtain IP.
Then check that the monitor gets an IP address from the router, for example:
192.168.1.50
The door station must be on the same network range, for example:
Monitor:      192.168.1.50
Door Station: 192.168.1.51
Gateway:      192.168.1.1
If the door station does not appear later, use SADP or HiTools Delivery on a Windows PC connected to the same switch to activate it and set the IP address.
6. Add/link the door station to the monitor
On the indoor monitor, look for:
Settings → Configuration → Device Management
or
Settings → Advanced Settings → Device Management
Then:
Search for nearby devices.
Select the door station.
Add it as the main door station.
Enter the door station admin password if asked.
Save.
If the door station is brand new, the monitor may activate it automatically. If it has already been activated, the monitor will need the existing password. If the password is unknown, the door station may need to be reset or password reset through SADP/HiTools.
7. Test the basic call
Press the call button on the door station.
The indoor monitor should ring.
On the monitor:
Answer the call.
Confirm video is showing.
Confirm two-way audio works.
Press unlock only if a lock has been wired in.
If the monitor does not ring, the most common causes are:
Door station and monitor are not on the same IP range.
Door station was not added to the monitor.
Door station has a different/unknown admin password.
PoE switch is not actually powering one of the devices.
The router is not connected, and the devices are sitting on different static IP ranges.
8. Set up mobile app access, optional
The product supports mobile control through Hik-Connect.
On the indoor monitor:
Go to:
Settings → Network → Platform Access
Enable Hik-Connect / Platform Access.
Set a verification code if requested.
Make sure status changes to Online.
On the customer’s phone:
Install Hik-Connect.
Create/login to the customer’s account.
Tap +.
Scan the QR code from the indoor monitor.
Add the device.
After this, when someone presses the door station button, the monitor should ring and the phone should receive the call as well.
9. If using an electric lock
The lock does not plug into the PoE switch.
It wires to the door station lock output, usually using:
Separate lock power supply
Electric strike or maglock
Exit button if required
Then configure the unlock time in the door station/monitor settings, usually around 1 to 5 seconds for a strike.
Your Shopping Cart will be saved and you'll be given a link. You, or anyone with the link, can use it to retrieve your Cart at any time.
Back
Save & Share Cart
Your Shopping Cart will be saved with Product pictures and information, and Cart Totals. Then send it to yourself, or a friend, with a link to retrieve it at any time.