


How to Configure Hik Connect with Gui 4.0 V4
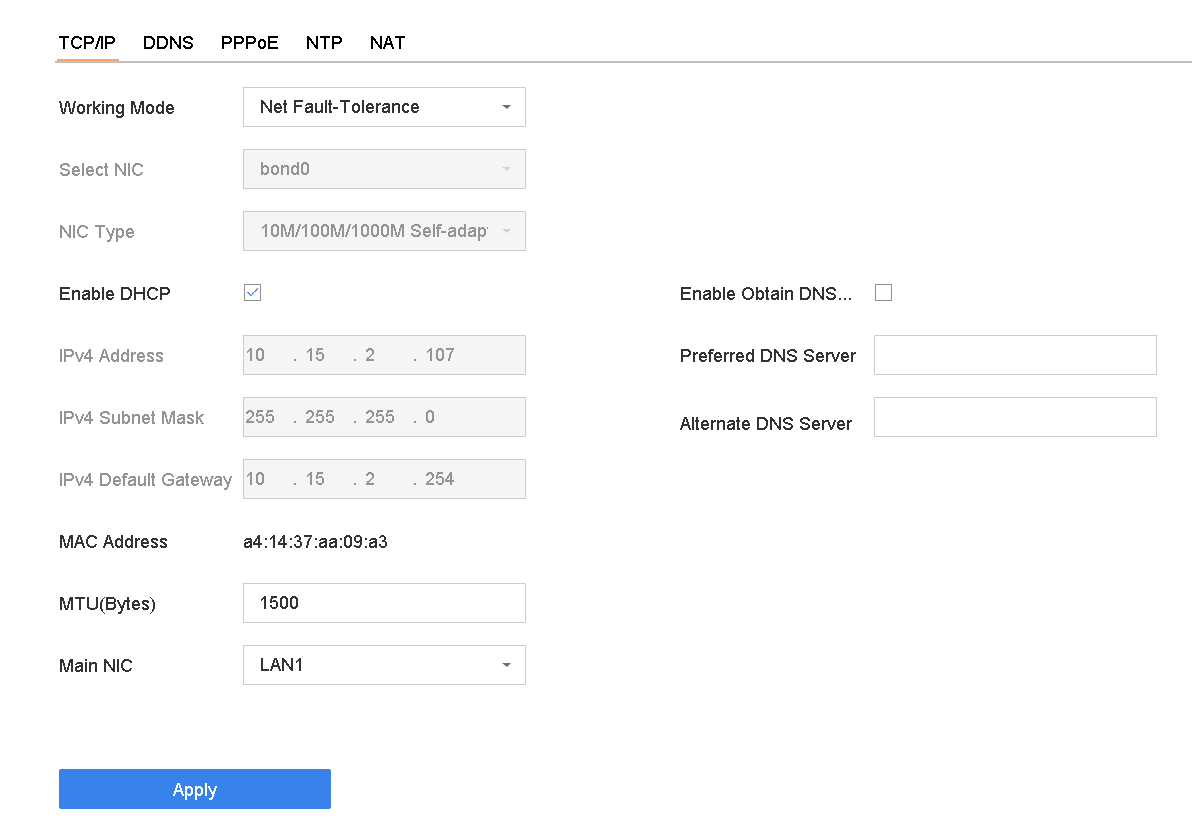
Step 1 – Go to System > Network > TCP/IP.
Tick “Enable DHCP” and “Enable Obtain DNS…” then click Apply
Step 2 – Go to System > Network > Advanced > Platform Access.
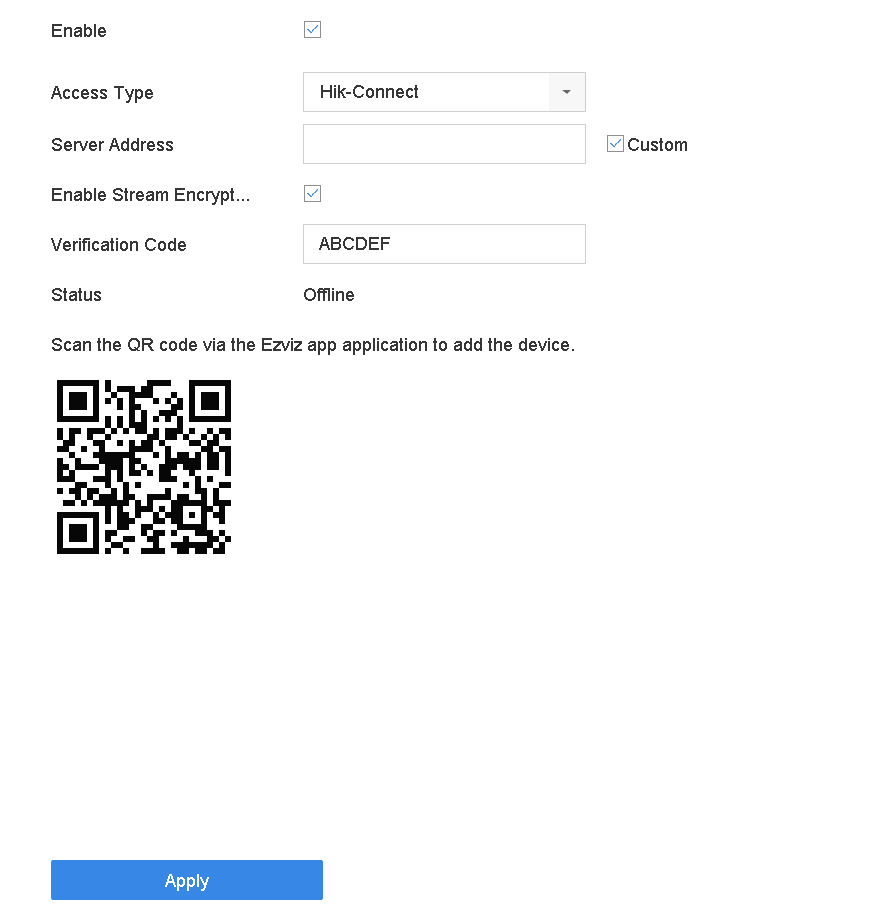
Step 3 Check Enable and a Service Terms window will pop up. Create your verification code, check to agree to the service terms and click OK.
Step 4 Click Apply.
Step 5 Add the device to your Hik-Connect account by scanning the QR code